In case you've been living under a rock, there's a wedding tomorrow. A royal wedding.
So let's make scones, shall we?
I blame it on the Today Show. I blame the fact that I know the names of Kate Middleton's twice removed cousins and all about her humble beginnings on the Today Show. There has been coverage on this wedding at least 20 minutes a day on the morning news for the last two months, and now I must watch the wedding.
And for some odd reason, most subjects or happenings I hear about always translate into food for me. The minute I hear of an event like this, my mind goes straight to the food I can eat while watching such a spectacle. Shepherd's Pie and Yorkshire Pudding came to mind but didn't appeal, and scones ultimately prevailed in the not-so-competitive field of English fare.
I've always avoided most scones because there is such a fine line between a good scone, and a scone that is too dry. They traditionally have a little bit of a dry taste, but this recipe will change your mind on what a scone should even taste like. These are seriously addicting and a new favorite in my book.
Here's the recipe scoop...
Scones seemed a little bit complicated to me so I did a step by step so you have no excuses. Seriously, these are so good and they took me exactly 20 minutes to prep... exactly 20 minutes and that's with pictures and this being my first time so just come on, trust me and make these. I bet you won't be sorry. If you don't want to trust me alone, I will let you know that this recipe is adapted from The America's Test Kitchen Family Cookbook. They do wonders with recipes and test them a thousand times to perfection.So here we go...
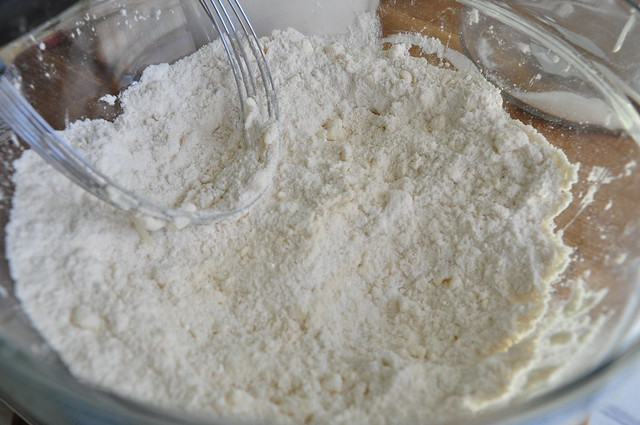
Adjust an oven rack to the middle position and heat the oven to 450 degrees. Place the flour, sugar, baking powder and salt in a medium size bowl. Using a pastry cutter, mix dry ingredients. 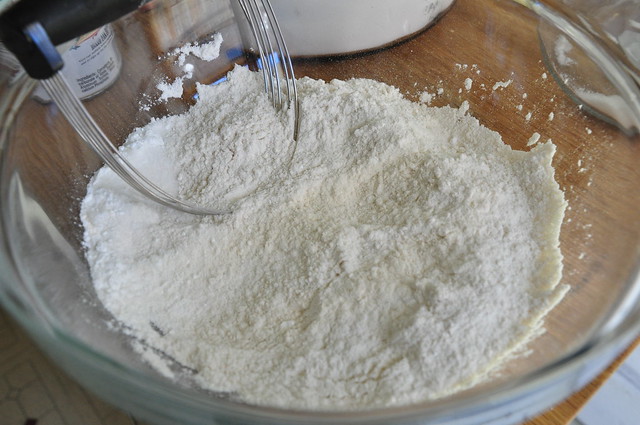
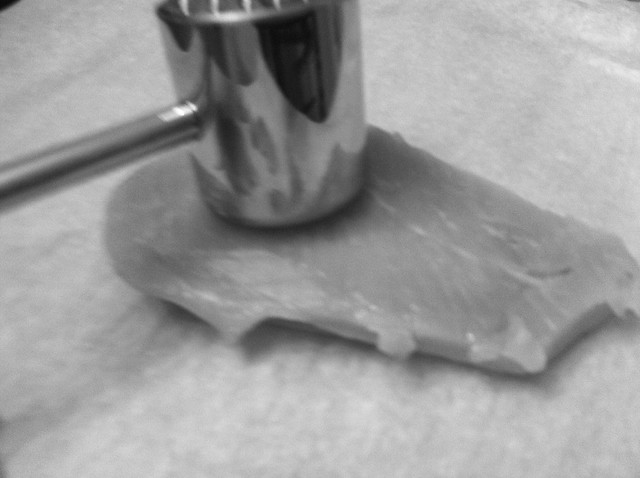
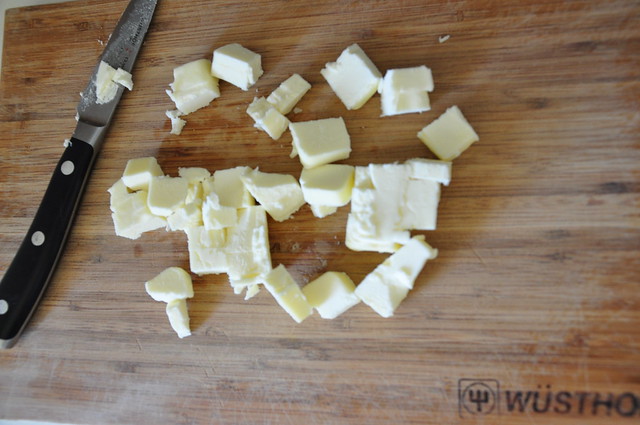
Cut chilled butter into 1/4 inch cubes.
Scatter the butter evenly over the top of the dry ingredients.
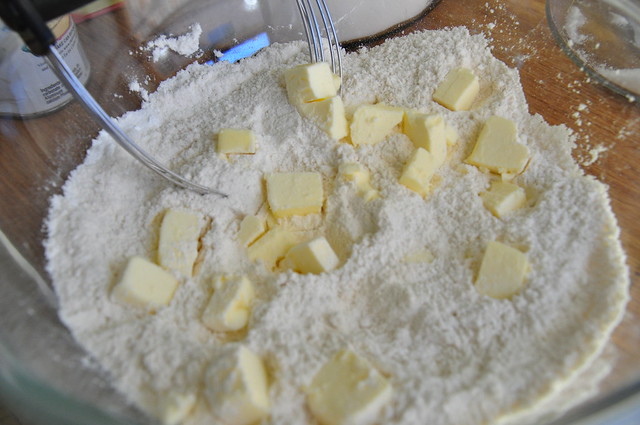
Cut butter into the dry ingredients and continue to cut butter until the mixture resembles coarse cornmeal with a few slightly larger butter lumps.
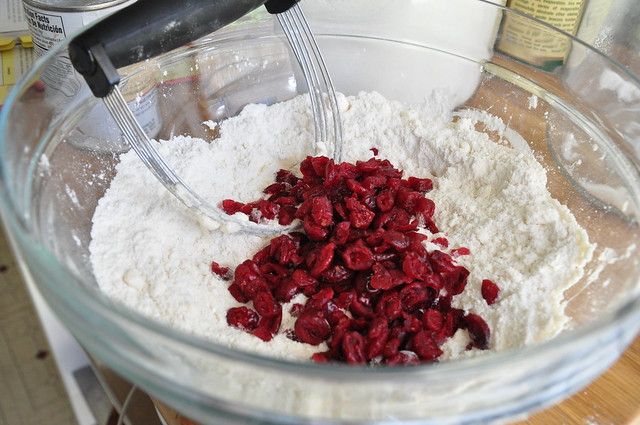
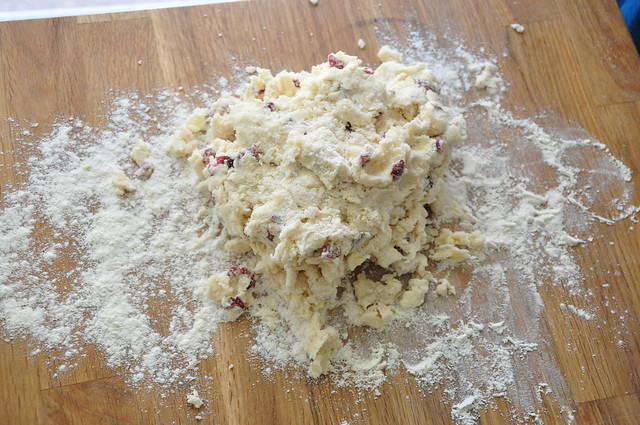
Add the cranberries and stir into mixture.
Stir in the cream with a rubber spatula until the dough begins to form, about 30 seconds.
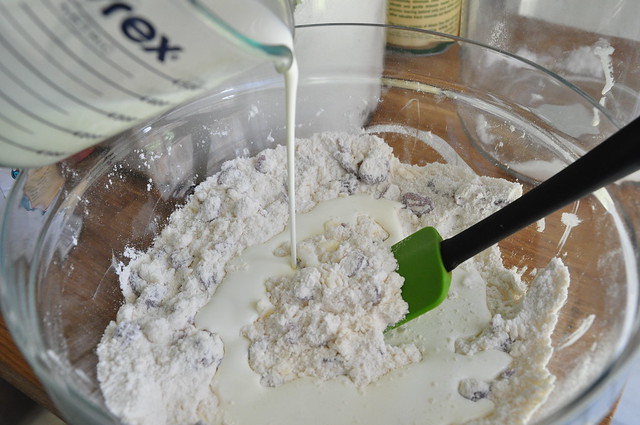
Stir in the cream with a rubber spatula until the dough begins to form, about 30 seconds.
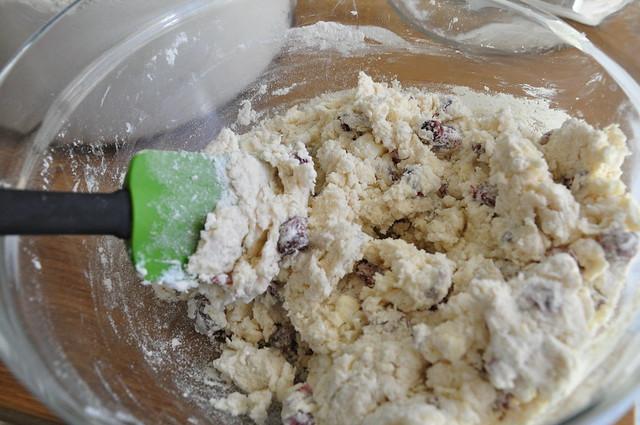
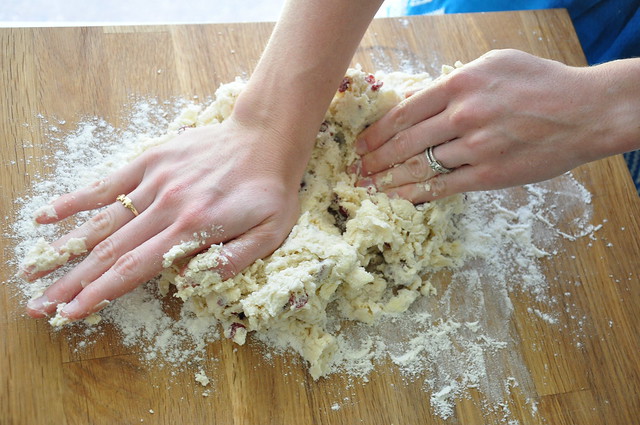
Turn the dough and any floury bits out onto a floured counter.
Knead until it forms a rough, slightly sticky ball, 5 to 10 seconds.
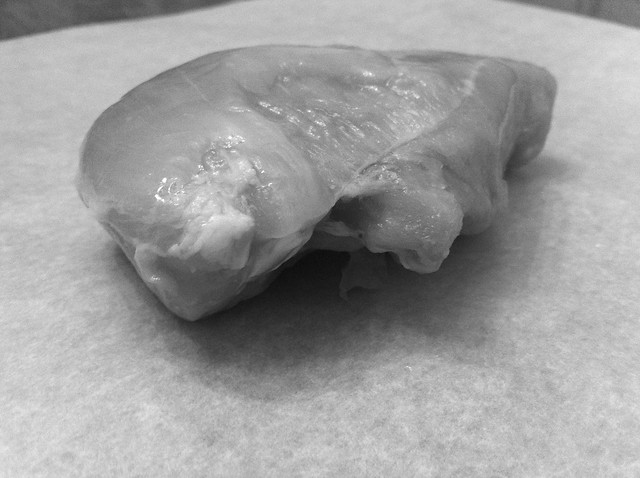
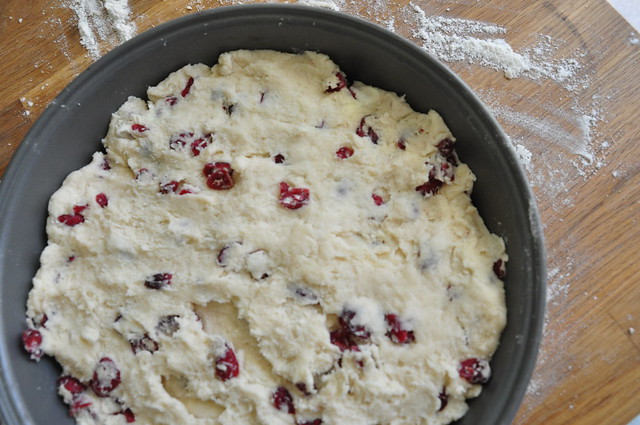
Press the dough into a 9-inch cake pan.
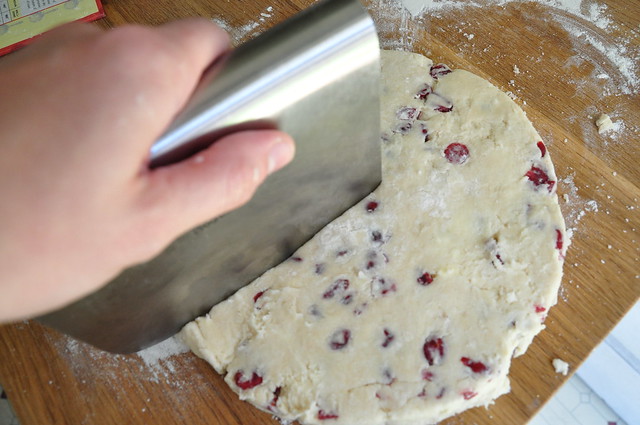
Unmold the dough.
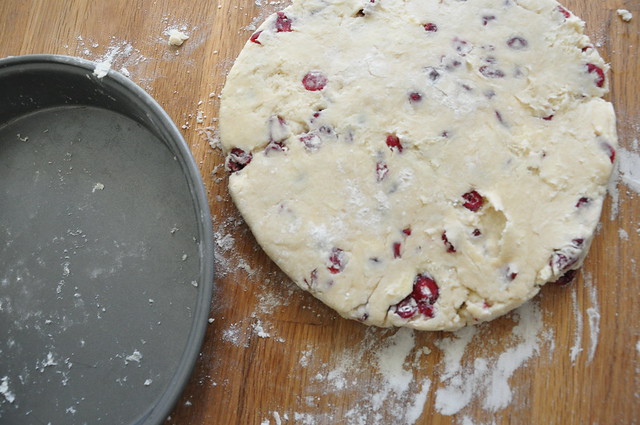
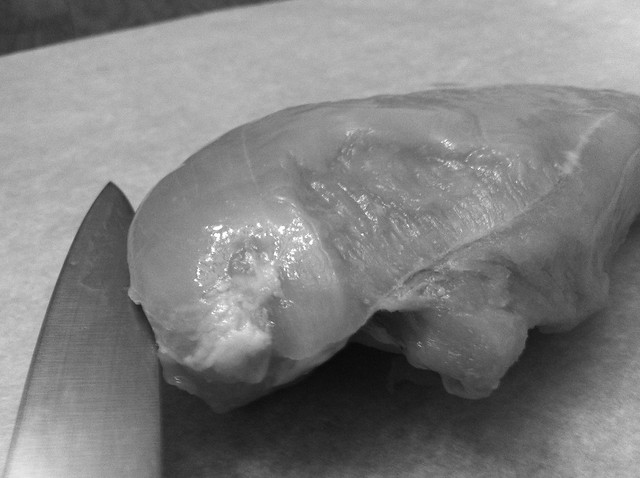
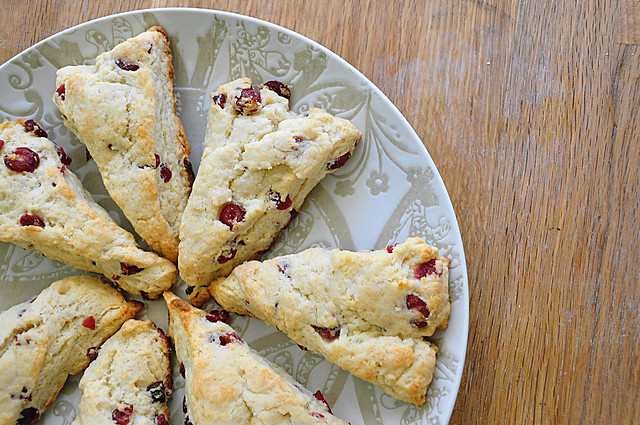
Cut into 8 or 12 wedges.
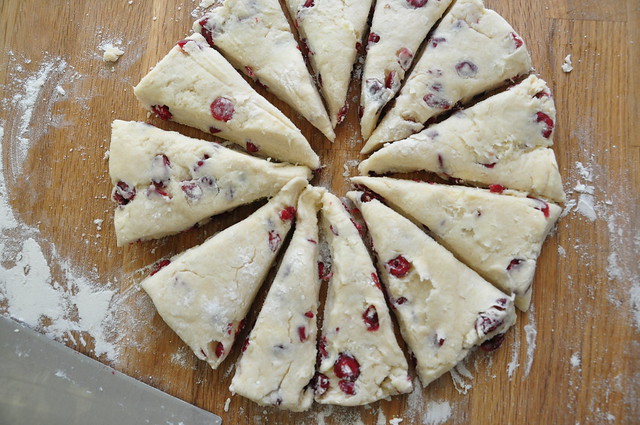
Place the wedges on an ungreased baking sheet.
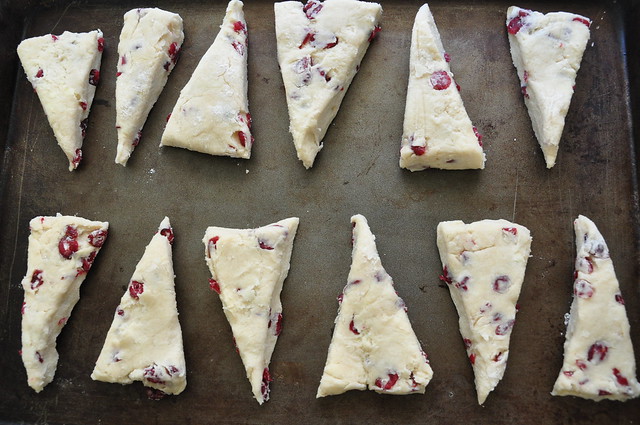
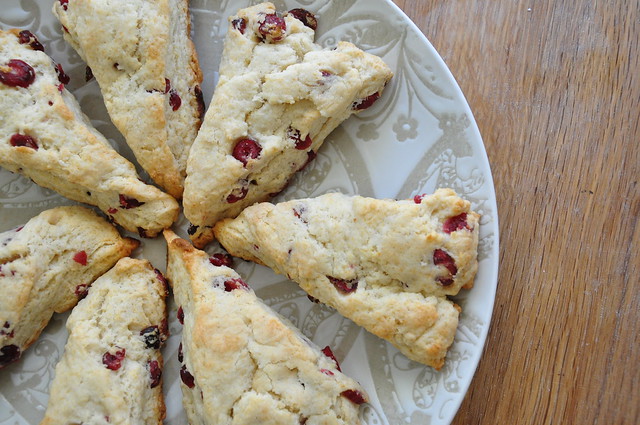
Bake until the scone tops are light brown, 12 to 15 minutes. (This was exactly 12 minutes for me and if you are not sure, check the bottoms of the scones to make sure they are not getting too brown). Coll on a wire rack for at least 10 minutes. Serve warm or at room temperature.
Cranberry Cream Scones
Adapted from The America's Test Kitchen Family Cookbook
Prep time: 20 minutes | Cook Time: 12 minutes
Recipe Notes
I made these the old fashion way with a pastry cutter. If you don't want to deal with getting out a food processor, use my steps. If you don't have a pastry cutter or want to use the food processor, follow the steps below the recipe. Resist the urge to eat the straight from the oven. Scones actually taste better when you lest them rest and set up a bit.
Ingredients
2 cups all purpose flour, plus extra for the counter
3 tablespoons sugar
1 tablespoons baking powder
1/2 teaspoon salt
5 tablespoons unsalted butter, chilled
3/4 cup cranberries
1 cup heavy cream
Tools
Pastry Cutter or Food Processor
9 inch cake pan
Step by Step
Adjust an oven rack to the middle position and heat the oven to 450 degrees. Place the flour, sugar, baking powder and salt in a medium size bowl. Using a pastry cutter, mix dry ingredients. Cut chilled butter into 1/4 inch cubes and scatter the butter evenly over the top of the dry ingredients. Cut butter into the dry ingredients and continue to cut butter until the mixture resembles coarse cornmeal with a few slightly larger butter lumps. Add the cranberries and stir into mixture. Stir in the cream with a rubber spatula until the dough begins to form, about 30 seconds. Turn the dough and any floury bits out onto a floured counter and knead until it forms a rough, slightly sticky ball, 5 to 10 seconds. Press the dough into a 9-inch cake pan. Unmold the dough and cut into 8 or 12 wedges. Place the wedges on an ungreased baking sheet.
Bake until the scone tops are light brown, 12 to 15 minutes. (This was exactly 12 minutes for me and if you are not sure, check the bottoms of the scones to make sure they are not getting too brown). Coll on a wire rack for at least 10 minutes. Serve warm or at room temperature.
PREPPING WITH A FOOD PROCESSOR
Fit a food processor with a dough blade. Pulse the flour, sugar, baking powder, and salt together in a food processor to combine, about 6 pulses. Scatter the butter evenly over the top and pule until the mixture resembles coarse cornmeal with a few slightly larger butter lumps, about 12 pulses. Add the cranberries and quickly pulse once to combine. Transfer the dough to a bowl and continue witht he steps above.